Selecting targets to scan
There are 5 different ways to select target files and directories to scan. The first is to pass the file paths as arguments from the command line.
user@HOST:~$ penguinpills ~/Desktop/file1 /tmp/folder1
When you pass arguments to penguin pills from the command line it will clear any existing paths from the targets table, add the new paths to the table and then immediately begin the scan. Only one instance of penguin pills can be opened at a time which makes it possible to pass file paths to penguin pills from the command line even after it's open and running.
user@HOST:~$ penguinpills &
[1] 3857
user@HOST:~$ penguinpills ~/Desktop/test

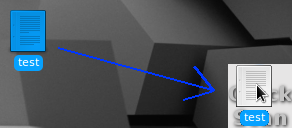
The second option is to use the QuickScan window. It was created to provide a permanently visible target for dragging files or folders onto in order to perform an immediate virus scan. When the QuickScan window is opened it will appear in the bottom right corner of the screen and will always remain on top of any other open windows. Anytime you need to scan a specific set of files or folders simply drag them onto the QuickScan window and the scan will begin immediately. The QuickScan window can be shown or hidden by clicking the middle mouse button while hovering over the systray icon or by right clicking the systray icon and selecting the "Show/Hide QuickScan" menu items.

The third option is to drag and drop files or folders directly onto the targets table. Unlike the options above this will not clear the targets table nor will the scan begin immediately. This enables you to drag and drop as many files as you need to prior to running the scan.
The fourth option is to click one of the "Add files" or "Add folder" buttons to add additional scan targets to the table. Once all of the targets have been selected click the "Start Scan" button.
There is one other way to select files to scan but it is not part of the application itself. You can use the penguinpills.desktop file included with the source code to register the application for use with certain mime types. Just drop the .desktop file into the /usr/share/applications folder and then any time you right click on a file on your desktop or in a nautilus or dolphin window you will be presented with the option to open that file or folder with Penguin Pills. When you use the context menu to select files to scan they will automatically be added to the targets table and the scan will begin immediately.
Selecting a scanner
The easiest way to select a new scanner is to simply scroll your mouse wheel while hovering over the systray icon. Scrolling down will select the next one in the list while scrolling up will select the previous one. You can also select a scanner from the drop down menu in the main dialog window.
Scanner templates
Everything related to the scanners can be customized through the use of an xml template. These templates are saved in the ~/.penguinpills/scanners folder. To add support for a new scanner simply copy one of the existing xml files and then edit the settings within that file to reflect the new scanner settings.
In the main dialog window there is an Options button. The window that opens when that button is clicked can be completely customized to show whichever options you choose. The settings for that window are contained within the supportedScanParams element in the xml files. There are 3 possible option types.
- a stand-alone checkbox
- a checkbox followed by a multiple selection menu
- a checkbox followed by a text box enabling user input
Each parameter is created using a param tag like the one below. The label attribute represents the text that will be displayed next to the checkbox. The value attribute represents the actual parameter that will be passed to the scanner. The appendOptionWith attribute contains the character that will be used to join any options to the parameter. For example, an = character or a space or an empty string if appendOptionWith equals "".
<param value="-p" appendOptionWith=" " label="Default action"/>
If the param element does not contain any child elements then a stand-alone checkbox is created. The appendOptionWith attribute is also ignored if there are no child elements. If the param element does contain option elements then a menu is created and displayed after the checkbox. You can add as many options as needed to each menu.
<option value="1" label="delete"/>
<option value="3" label="repair"/>
<option value="4" label="stop"/>
As with the param element the label on the option element represents the text that will be displayed and the value attribute represents the value that will be appended to the parameter. If the userInput attribute is specified and set to 1 then a text box will be created instead of a menu. The value attribute is used as a default value for the text box and the label is used for a tooltip. Both attributes are optional.
<option value="" userInput="1" label="Enter file path"/>
|


